AWS Cognito OAuth 2.0 Implicit Flow
How to use AWS Cognito OAuth 2.0 Implicit Flow?
This tutorial will discuss the OAuth flows in three parts, and you are now reading Part 1. I will show some examples on how we can use the different OAuth grants in Cognito and also retrieve the user info using the Access token. This will be a hands on topic, so you can have a better understanding of each flow.
To replicate the form submissions and API requests of an application, I will use Postman in our examples. If you have not used Postman before, it is a collaboration platform tool for API development, I suggest that you check it out, it’s a robust API tool and easy to use.
App Integration
Before you can start integrating your application to AWS Cognito, you need to have a User Pool and an App Client, if you do not have one yet please read my tutorial on AWS Cognito User Pool.
Under App Integration settings, you will see the App Clients in your User Pool. Click on the pencil icon in the top right corner of the panel and edit the identity providers and OAuth 2.0 settings.

Here in our example I have prepared two App clients for Front-End and Back-End application use.
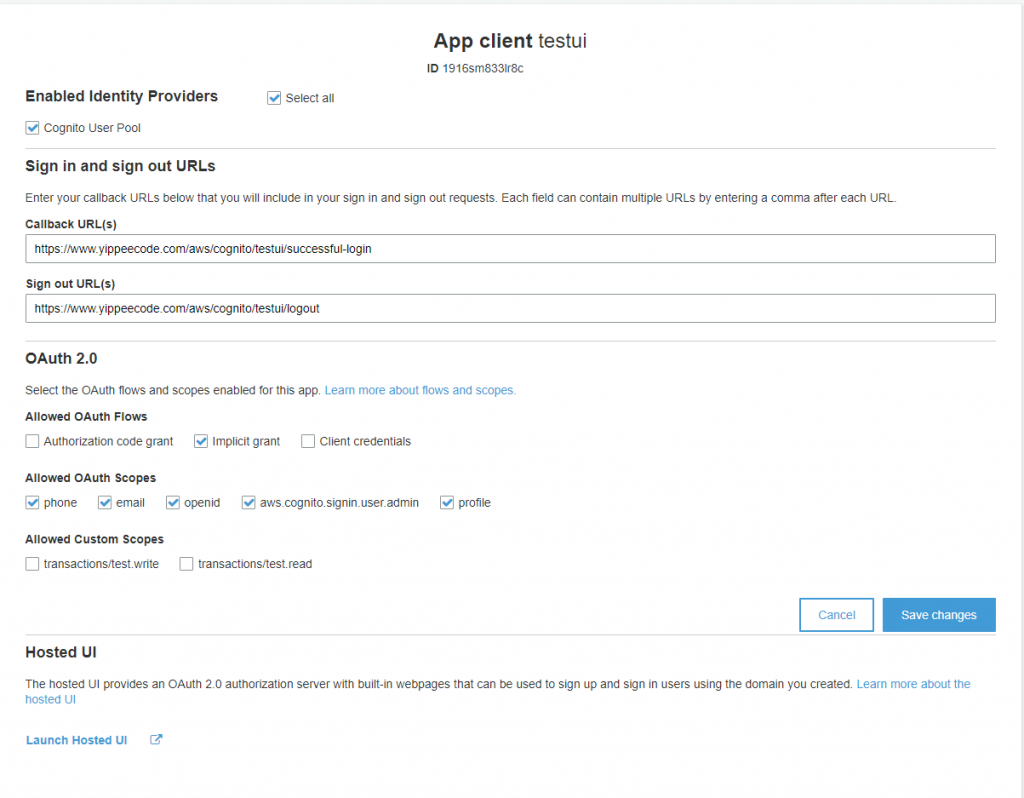
Let’s go over the available configurations.
Enabled Identity Providers. Check the Cognito User Pool since we are using this to authenticate with the user. Also, if you have another federated identity provider you will be able to select those in here.
Sign In and sign out URLs. The callback and redirect URLs when a Sign In and Sign out events are successful.
Allowed OAuth Flows. These are the different OAuth authorization grant flows that your App Client will support.
Allowed OAuth Scopes. The authorization gives access to the different scopes in your App Client. For example aws.cognito.signin.user.admin scope grants access to Cognito User Pool API operations, phone gives access to the phone number and same for the email. This setting is not applicable to Client credentials flow.
Allowed Custom Scopes. You have the default scopes and at the same time you can add your own custom scopes for your App Client. Client credentials flow will have access to Custom Scopes.
If you want to dive deeper on each configuration you may visit the full documentation page.
Implicit grant
To enable this grant put a check on Implicit grant and click on Save Changes button. Also the App Client using this flow must NOT generate a Client Secret key, otherwise the authentication will not work.
This is the simplest among the three supported flows. On successful sign in, the user pool tokens will be part of the Query string in your Callback URL as a response. Though it is easy to implement, the simplicity of this flow has a trade off when it comes to security, since it passes the token without any confirmation that it has been received by the client.
Testing Using the Hosted UI
Now we can quickly test the Implicit flow by using the Hosted UI. Click on Launch Hosted UI link at the bottom of the app settings panel.
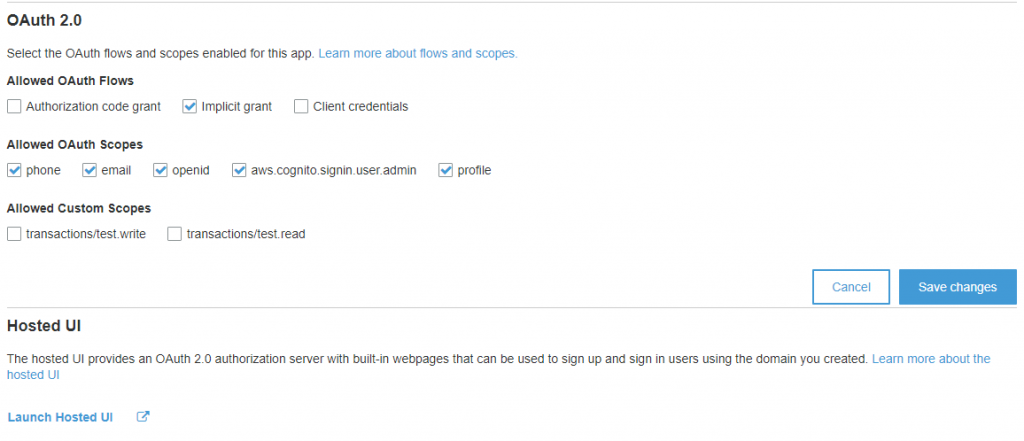
You will get redirected to a Sign In page. But before we can move forward with our test, we need to create a user first in our Pool. Under General Settings, go to Users and Groups. Then Click on Create User.

Enter the Username and Temporary password, then click on Create User.
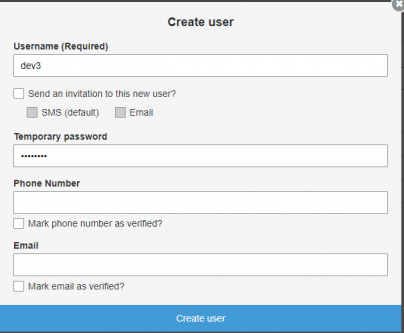
Now we can continue with the sign in using the new test user account.
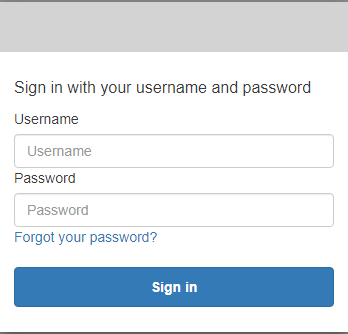
Suppose that this integrates with your application, and the user gets redirected to the callback URL along with the Query parameters.
id_token=token&expires_in=3600&access_token=token&token_type=Bearer
With a few lines of Javascript code you can extract the access_token and use this to get the information of the authenticated user.
const cognitoAuth = new URLSearchParams(window.location.search);
const access_token = cognitoAuth.get('access_token');
const token_type = cognitoAuth.get('token_type');
USERINFO Endpoint
Here I’m using Postman to demonstrate how to get the user info using the access token.
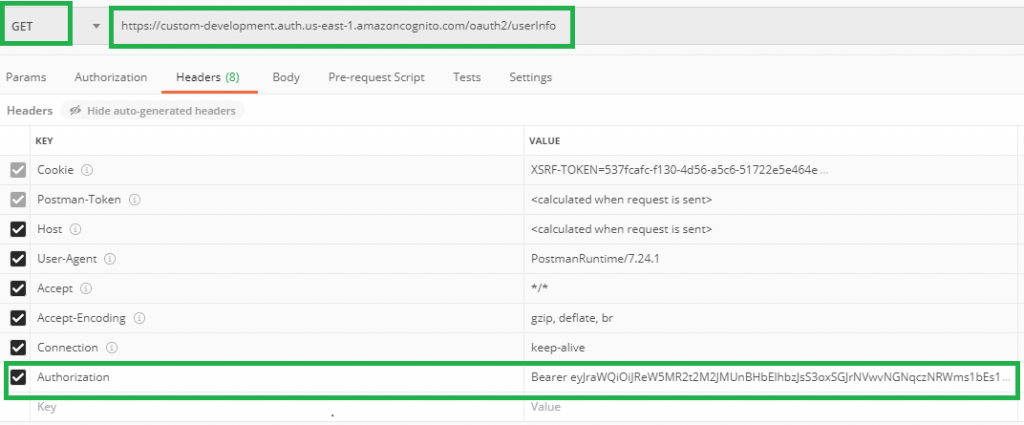
Notice the headers, including a parameter Authorization. The value is the token_type (Bearer) and access_token (JWT Token) from the result of a successful sign in.
The URL endpoint is something you can find in the User Pool’s profile. Under App Integration, go to Domain name. To complete the URL, append the path /oauth2/userInfo to your domain.
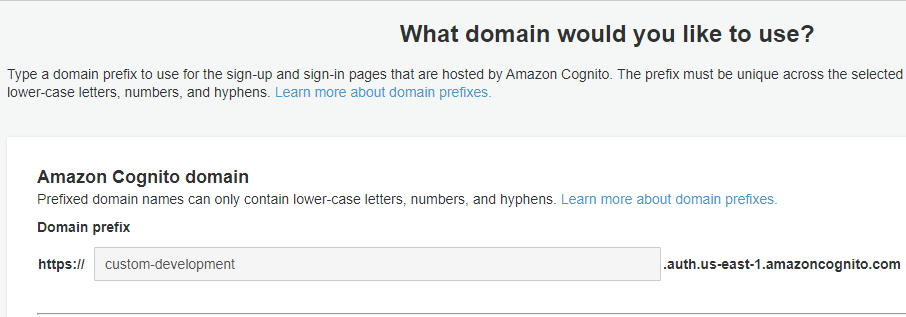
As a result, you will have a URL similar to this example.
https://custom-development.auth.us-east-1.amazoncognito.com/oauth2/userInfo
Finally, the request must be submitted through the GET method. If you submitted a valid request, you should receive the information about the User as a response.
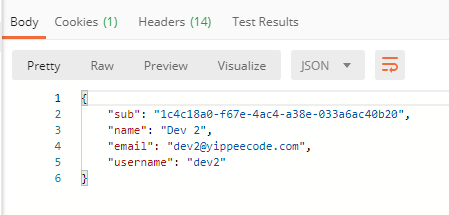
If you use an invalid or expired access token, you will receive an error response.

On the next topic AWS Cognito OAuth 2.0 Authorization Flow, we will discuss the Authorization code grant and how this is different from Implicit flow.