AWS Cognito OAuth 2.0 Client credentials Flow

How to use AWS Cognito OAuth 2.0 Client credentials Flow?
This tutorial will discuss the OAuth flows in three parts, and you are now at the last part. The other topics related to this tutorial are AWS Cognito OAuth 2.0 Implicit Flow and AWS Cognito OAuth 2.0 AuthorizationFlow.
Client credentials
I mentioned in our introduction the steps on how you can setup your App Client to use OAuth flows under App Integration setting. If you have not done this I suggest reading that section of the tutorial first.
To enable this grant put a check on Client credentials and click on Save Changes button. Also the App Client using this flow must generate a Client Secret key.
The Authorization header parameter requires Client ID and Secret converted to BASE64.
Authorization: Basic BASE64(CLIENT_ID:CLIENT_SECRET)
Example using Python base64 module.
import base64
client_id = "k6h0hnjenh7auvi2as"
client_secret = "2f4hj6giji87hb4u2itlshfk63jvm4voh6"
base64.b64encode(f"{client_id}:{client_secret}".encode())
Example using Linux CLI.
echo -n "k6h0hnjenh7auvi2as:2f4hj6giji87hb4u2itlshfk63jvm4voh6" | base64
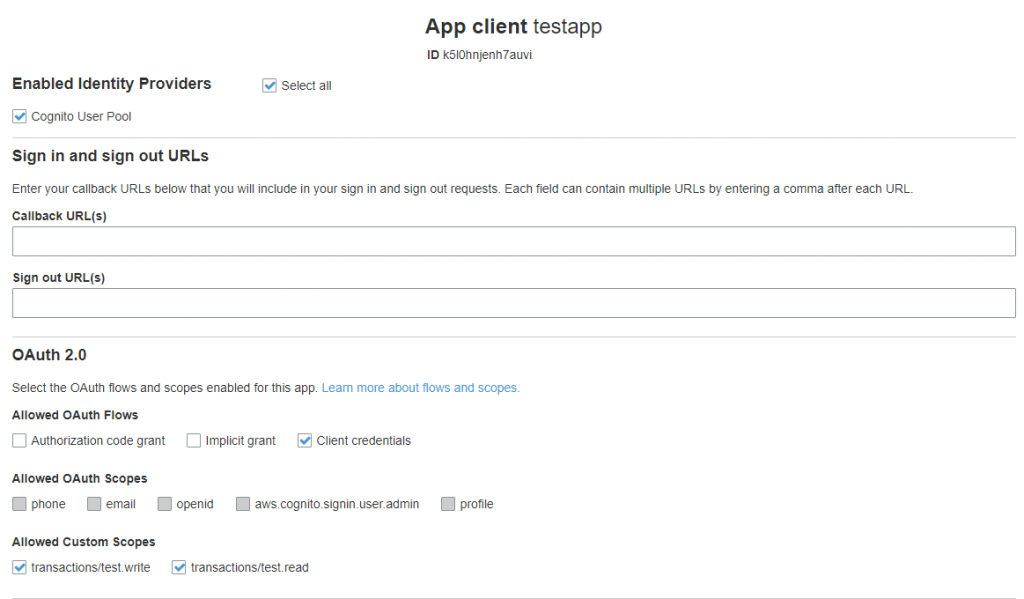
AWS Cognito OAuth 2.0 Client credentials Flow is for machine-to-machine authentication. For example, a third party application will have to verify its identity before it can access your system.
This flow submits the request using Back-End programming language (e.g. Python, JAVA, Nodejs, PHP), that is why having a Client secret key submitted along the request makes sense since the flow has nothing to do with the end user and it does not access the USERINFO in the User Pool.
Testing a Back-End Request
Here I am using Postman to demonstrate how you can get the access token by using the App Client credentials.
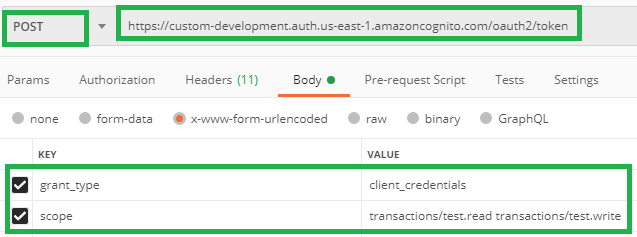
Form Request Body parameters:
grant_type – Must be client_credentials, the flow that we are using here.
scope – Optionally, you can submit custom scopes to take into account the type of access (read/write). Multiple scopes will be separated by a whitespace.
The URL endpoint is something you can find in the User Pool profile. Under App Integration, go to Domain name. To complete the URL, append the path /oauth2/token to your domain.
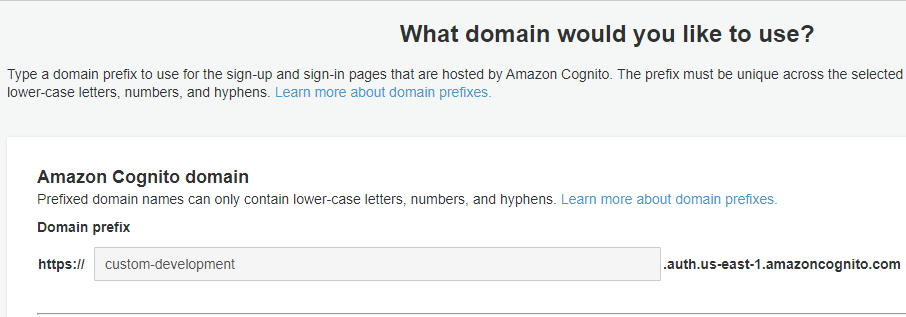
As a result you will have a URL something like this example.
https://custom-development.auth.us-east-1.amazoncognito.com/oauth2/token
Submit an HTTP Post request with content type application/x-www-form-urlencoded. The header also include the required parameter Authorization Basic BASE64(CLIENT_ID:CLIENT_SECRET)
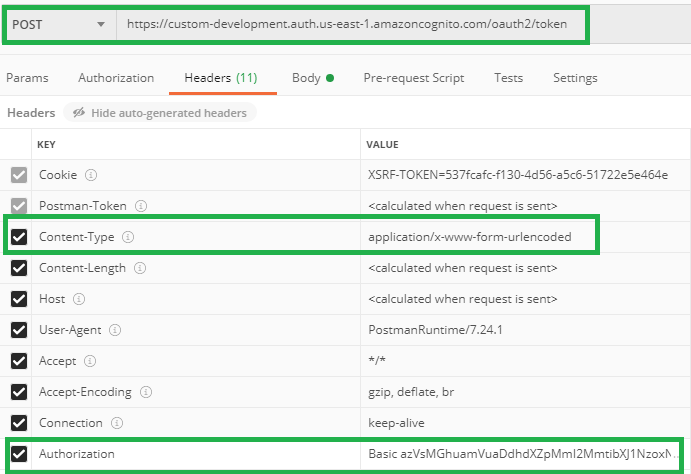
Upon successful authentication, you will immediately get the access Token as a response.
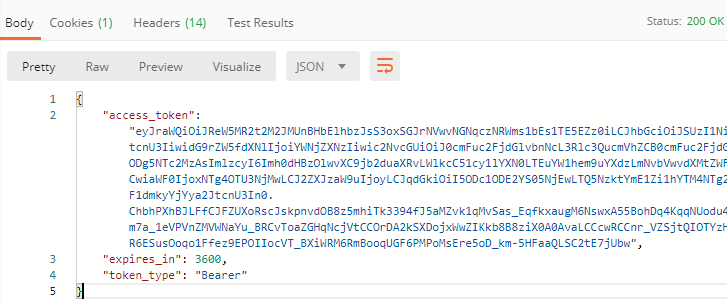
After authentication, the succeeding requests can now use the access_token (a JWT token) to verify its identity. In your system, the token can be decoded to verify the signature of the JWT token.